Hobby Lobby Finish #2

Posted on

This project was so much fun to work on. The floss seemed different from the floss in the previous Dimensions kit I just did. It seemed less smooth and shiny, and reminded me more of DMC’s now discontinued linen floss. It also didn’t fray and get knotted the way the previous Dimensions kit floss did.

I love doing French knots, and this project had several of them. It also had Turkey Work stitches for the tassels (which were cut instead of being left as loops).

Now what will my next project be?

XXX
Carrie


Hobby Lobby Finish #1

Posted on

We have a finish! Being sick for a week didn’t help, as I could barely get out of bed. I certainly didn’t have the ability to focus on stitching. But I finally got over the worst of it and took a couple of days to do nothing but watch TV and stitch. Whenever I get sick, I have the habit of trying to get back to doing my normal routine too quickly, and then I have a setback and end up being sick longer than I should have. So this time I decided to take it easy for a couple of extra days. Luckily no one else in the house got sick, and I’m wondering if I just wasn’t in a really bad flare instead of being “contagious” sick. I feel like my inflammation levels were super high and I just needed tons of sleep. My husband thinks it was actually the physical therapy exercises I have been given to do at home that caused me to be out for the count… I sure hope not because I’m depending on those exercises to get my pain levels down a notch.

I still have to mount this in the hoop that came with the kit but it is pressed and ready to go. I think I will move onto a new project and then finish off a bunch of things all at once.

XXX
Carrie


Give Thanks

Posted on

After ripping out the wording because it was too low and got in the way of the border, then restitching it, then ripping out more because I STILL didn’t have it right, I am finally done with this project! It took much longer than it should have to complete, the border was really boring to stitch, and some of the colors that came in the kit were just awful and needed to be replaced (the pumpkin was supposed to be stitched with DMC 975!)… but now that it is complete I just love it. I am usually not a big fan of buttons as embellishments but the green heart button is really cute. I have another Bent Creek zippers kit to work on for Halloween but the pumpkin on that one uses the same dark brown floss, so I am going to replace it with a Weeks Dye Works color like I did here. But since one skein was exactly enough without really having any extra to spare, I think I am going to have to order another one before I start. And actually, I should order two skeins and use both of those and keep the one I have for something else, since the dye lots will likely be quite different.

XXX
Carrie


Oops!

Posted on

Whoops! I forgot to add the “bling” to Santa’s cap! The design called for a single strand of green floss to make a pom pom, but I wanted something more 3-dimensional. At first I thought about doing a green pom pom in turkey work, but then I found that I had these teeny little jingle bells I picked up at Hobby Lobby last Christmas, “just in case”. I think it looks adorable!

XXX
Carrie


Stripey Santa is Done!

Posted on

My stripey Santa from a Durene Jones design is done! My first thought was to use these wooden snowflake buttons in place of the smaller white stitched snowflakes, but they were much too large. So I will work them into the finishing somehow when I turn this into a pillow or flat fold.

I decided not to stitch the bottom row of white that Santa is stitching on, because the white really doesn’t show up well on this Vintage Blue Whisper fabric from Zweigart. Instead I may use a piece of lace stitched onto the fabric, or come up with some other way to show him off.

XXX
Carrie


Witches Brew

Posted on

Now that this is done I am very pleased with how it turned out, although I am a bit disappointed about there not being any purple in the design. But I’ve already found myself a new Halloween freebie to work on, a Durene Jones design that I think will look amazing on some linen I hand dyed purple a couple of years ago.

This design is a freebie from Cheryl McKinnon at Tiny Modernist.

XXX
Carrie


A Treat for Rudolph

Posted on

I love the colors in this project. Although the stitches were a bit harder to see than usual because of the fabric, I think it turned out wonderfully and I can’t wait to get this stitched up into a “burlap” sack that I can add some reindeer feed to for next Christmas. (The “feed” will probably something non edible to ensure it doesn’t go bad!)

The pattern is from CrossStitcher magazine January 2022 issue and was designed by Cheryl McKinnon of Tiny Modernist.

XXX
Carrie


Ready For Snow

Posted on

This was another project that I knew I had to stitch as soon as I saw it!

Lizzie Kate Ready For Snow. Stitched with DMC floss on 14 count Zweigart Vintage Country Mocha. 

This will be a nice addition to my collection of snowman “smalls”.

Since I had the chart only, I used a plastic snowflake button from Hobby Lobby and cut the shank off and attached it with long stitches. I did alter the colors a bit; since I use regular DMC instread of the overdyed floss called for, I wasn’t too happy with the conversions. After stitching the words “ready” and “sn-w”, I didn’t care for the teal shade or the brighter red that was to come next. The two reds were almost identical, so I kept the word “ready” as it was but then chose two different red shades for the border and scarf. I also chose a much more bright teal instead of the dull light blue that was supposed to be used. This made it match the cover photo more, without having to use the more expensive overdyed floss.

XXX
Carrie


Gingerbread Mandala

Posted on

Merry Christmas! I was finally able to finish off these little guys today. I don’t know how I will be finishing it off, but this turned out so cute! I was a bit worried about the color scheme in the beginning but I think it all came together nicely.

I just picked up this pack of fat quarters at Walmart and I think one of them will work perfectly for the finishing!

XXX
Carrie


Rudolph!

Posted on

Rudolph is finished! I just love how he turned out. I did struggle a bit with the red polka dot fabric because when I cut it straight on one side, the polka dots did not line up correctly in the perpendicular direction – they went downhill. In the end I decided to not try to line the dots up evenly with the edge of the linen, and I think it turned out OK. I also always struggle with how much stuffing to add to these little cushions, and I keep adding more and then taking some out. I am too much of a perfectionist!

XXX
Carrie


Merry Christmas!

Posted on

I finished this cushion a couple of weeks ago but didn’t have any Christmas decorations up to display it and take a photo. So far, this is still all we have as of December 11. We need to put a tree up but I just don’t know when that will happen. Santa can’t put gifts under the tree if there isn’t one, so that is next up on the to-do list. We plan to have a real tree this year (I’ve never had a real tree, ever!) so it will be a lot more work than just dragging the artificial tree out of the garage. My husband said we also need tinsel if we are going to have a real tree (normally I use wired ribbon). The only place I could find any was target.com so that is on the way and should be here Monday.

The weather is absolutely horrendous right now. My daughter was supposed to have a bowling Christmas party with Girl Scouts but they cancelled it a few hours ago. I am somewhat thankful even though that will mean a lot of disappointed kids. I heard from one mom that the roads are really treacherous and I’m glad to stay inside the warm house. Maybe it’s time for some Christmas music and a mug of hot chocolate!

I hope you have a lovely Christmas and a happy New Year!

XXX
Carrie


Hoop Finishing Tutorial

Posted on

Today I am going to show you how I finish my cross stitched projects in an embroidery hoop.

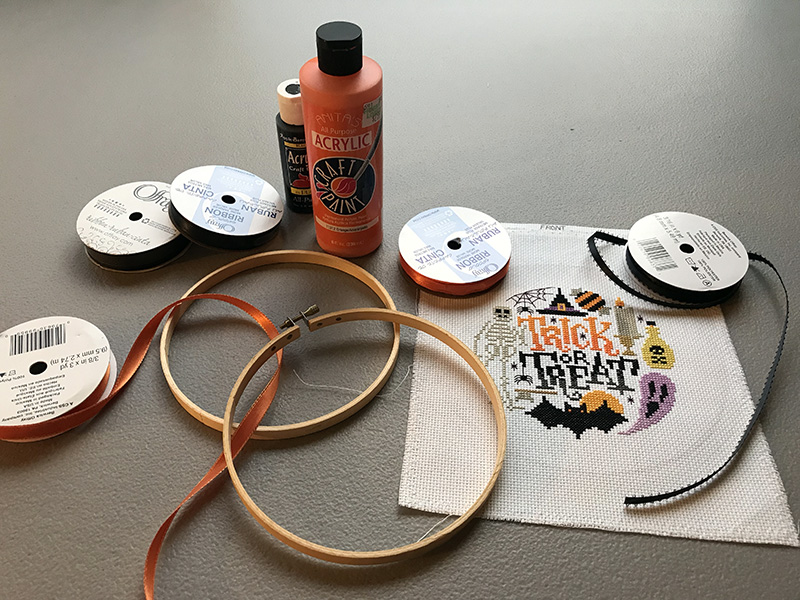
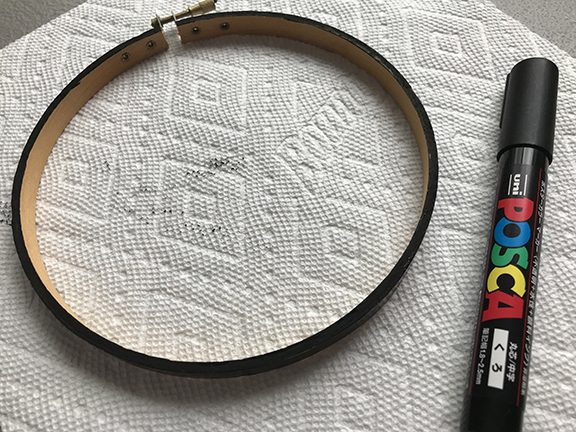
First, gather your materials. You will need paint and a paintbrush, or a paint marker such as a Posca pen. When using paint I like to use the small bottles of acrylic craft paint and a wooden handled sponge applicator instead of an actual paintbrush. Cover your work surface.

You will also need felt that matches the color of your fabric, ribbons and other embellishments, scissors, and a hot glue gun.

Carefully paint the outer hoop only, using thin coats of paint. It is better to let the project dry and then add a second or even third coat, rather than trying to paint on one thick coat. Try not to get paint on the inside of the hoop, but be sure to paint the outside edges. You will probably need to do one side, let it dry, then do the other.

If you want to wrap a decorative ribbon around the hoop, follow the next step. If you will be painting your hoop only, you can skip this part.

Add a drop of hot glue to the top of one side of the hoop and attach your ribbon at an angle. When it is dry, cut off the edge to be flush with the hoop. Slowly wrap the ribbon around the hoop, leaving a gap so the contrasting paint color can show. Add a drop of glue on the underside of the hoop only, about every other wrap. Use only as much glue as needed to ensure a secure hold. Too much glue will be messy and bumpy.

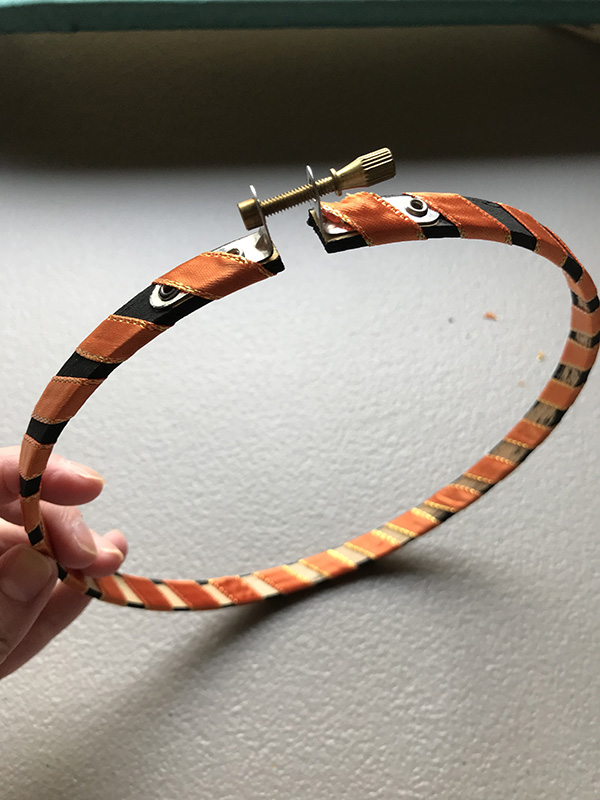
When you get to the other end of the hoop, add a drop of glue to the end and trim off the end just like you did when you started.

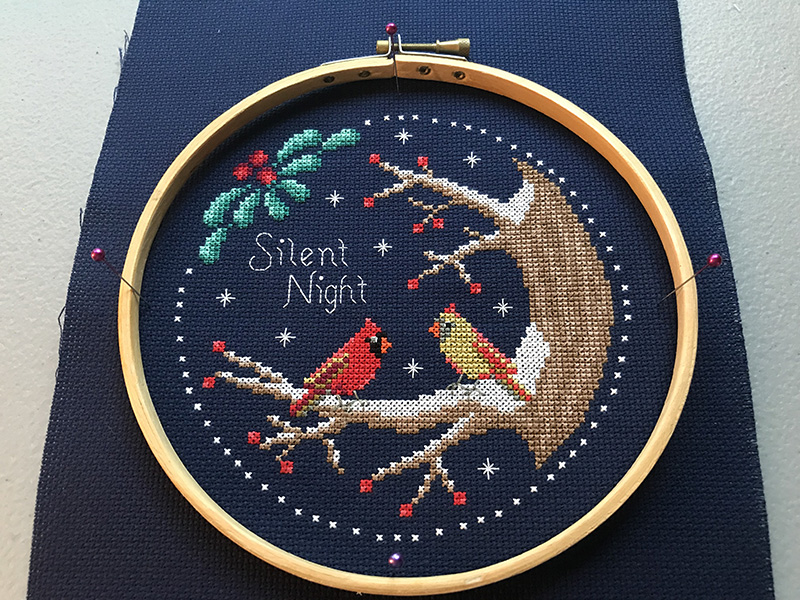
Place your finished cross stitch project in the two hoops and tighten it, being sure the design is centered and the fabric is taut.

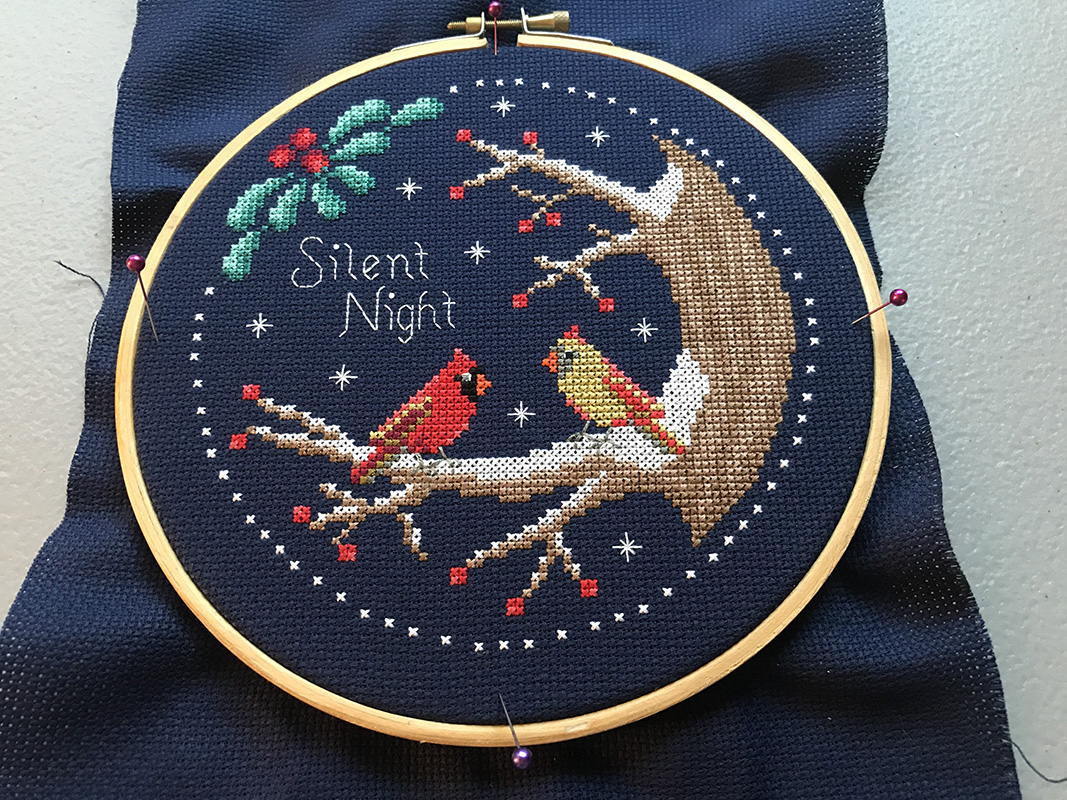
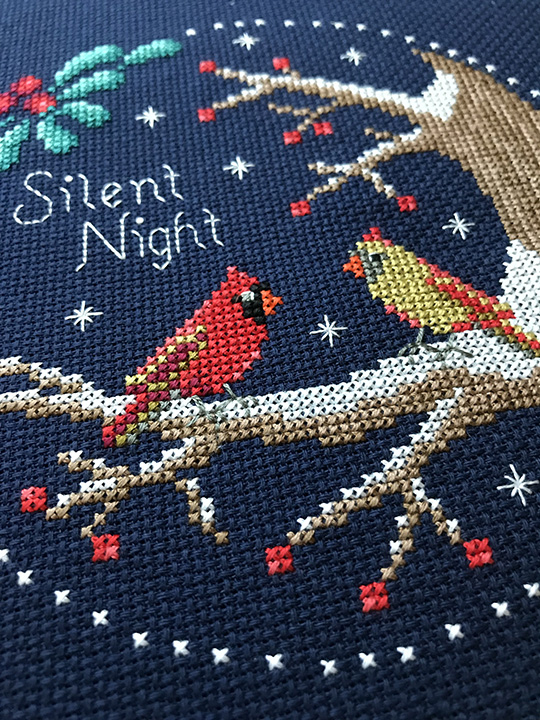
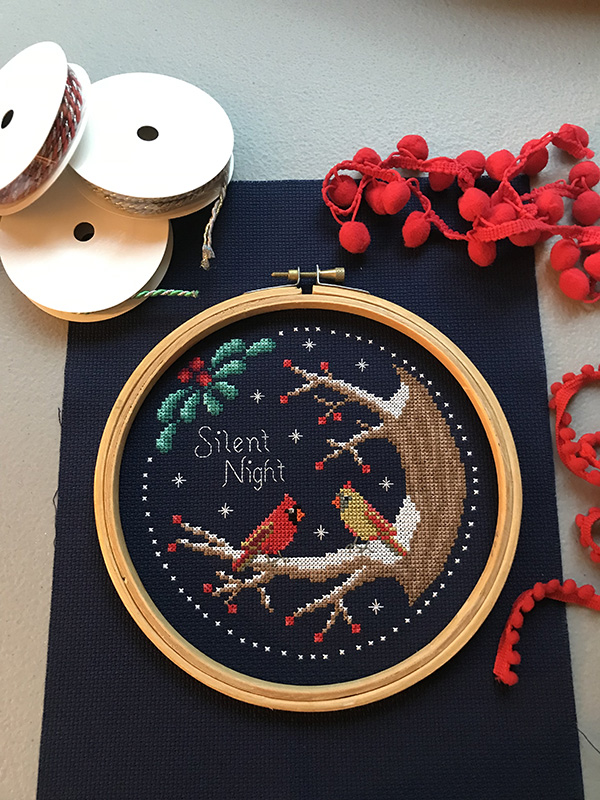
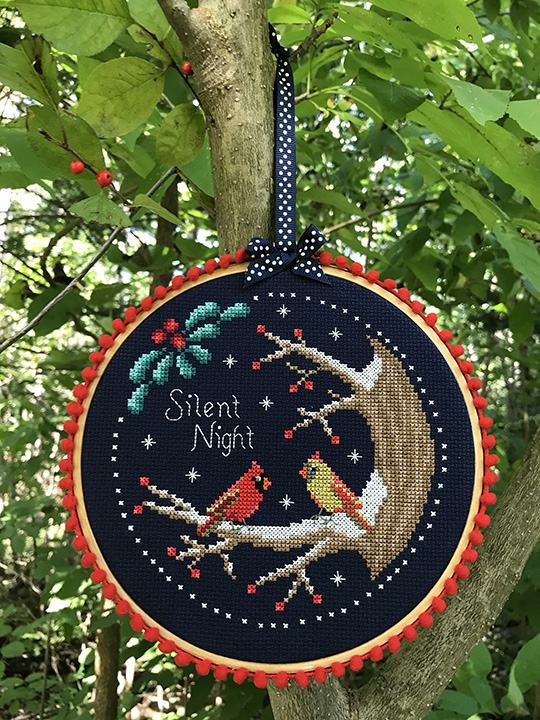
If you find it difficult to get the hoop exactly centered, as I did on this Silent Night design with a circular stitched border, lay just the top hoop on the fabric and use pins to mark the four sides. Count an equal number of stitches from the sides of the stitching and keep moving the pins, one Aida block at a time, until you have an equal number of empty stitches on all four sides, as shown below.

Cut the excess fabric away from the hoop. You want to leave just enough fabric to be able to wrap around the hoop and glue down to the inner sides of it.

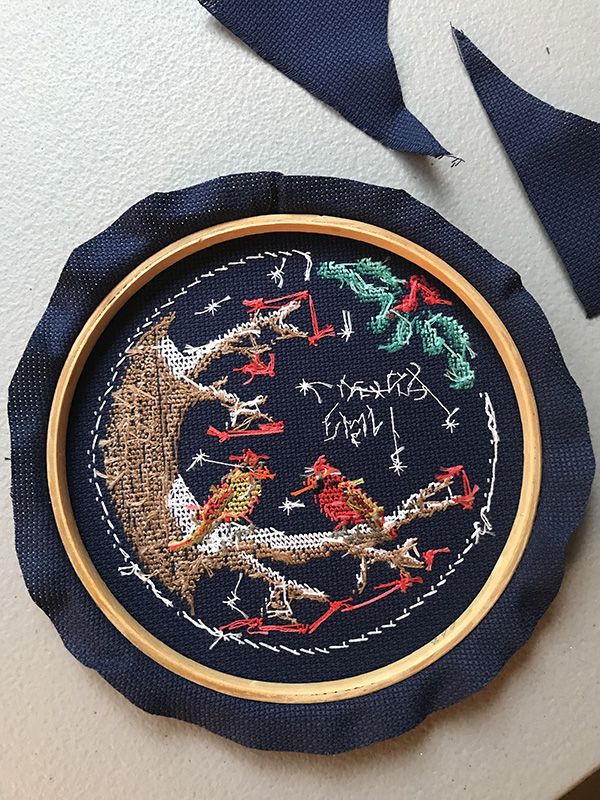
Carefully fold the cross stitch fabric over the inner hoop and hold it in place with hot glue. Continue this process around the entire hoop. You want to be sure that the fabric you are folding over isn’t so big that it lays on the back of the stitched piece, to avoid a bulky finish.

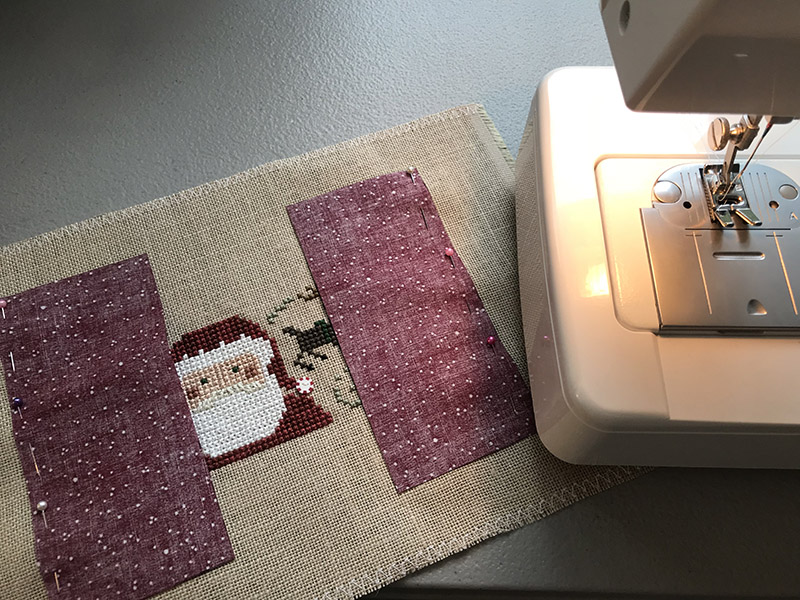
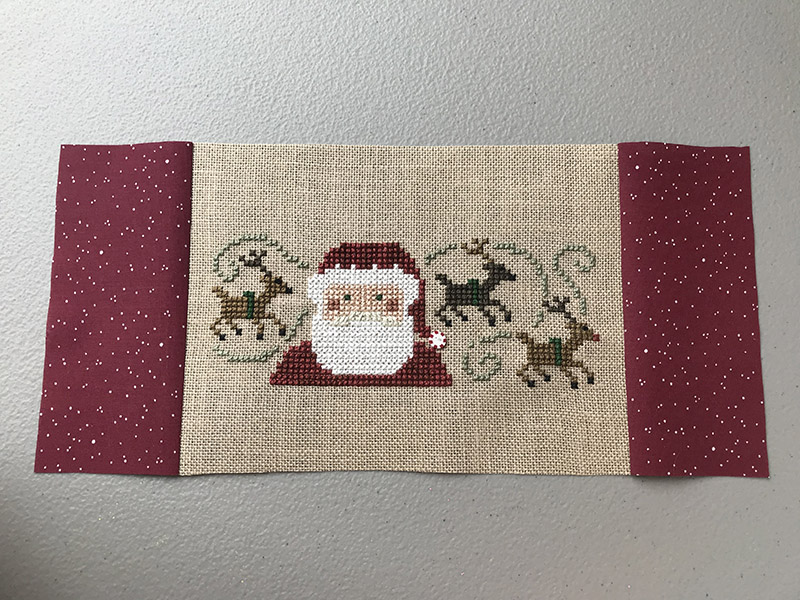
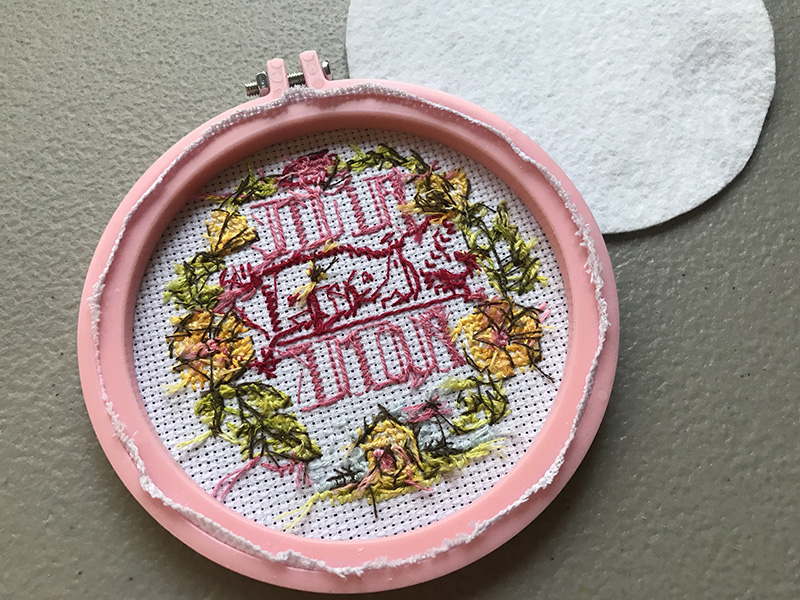
Sometimes you won’t have much excess fabric at all, such as with this free cover kit that came with an issue of The World of Cross Stitching magazine. When this happens, it may be easier to trim all excess fabric off after the project is in the hoop.

Next, cut a circle of felt the same color as your cross stitch fabric and glue it around the edges of the back of the hoop. You can also add a second, slightly smaller smaller piece of felt directly to the back of the stitching, and this will help the design not be see-through if you are hanging it in a window where sunlight will shine through it. I would caution against adding glue to this piece, however. I try not to let glue ever touch my stitching, as it can yellow over time.

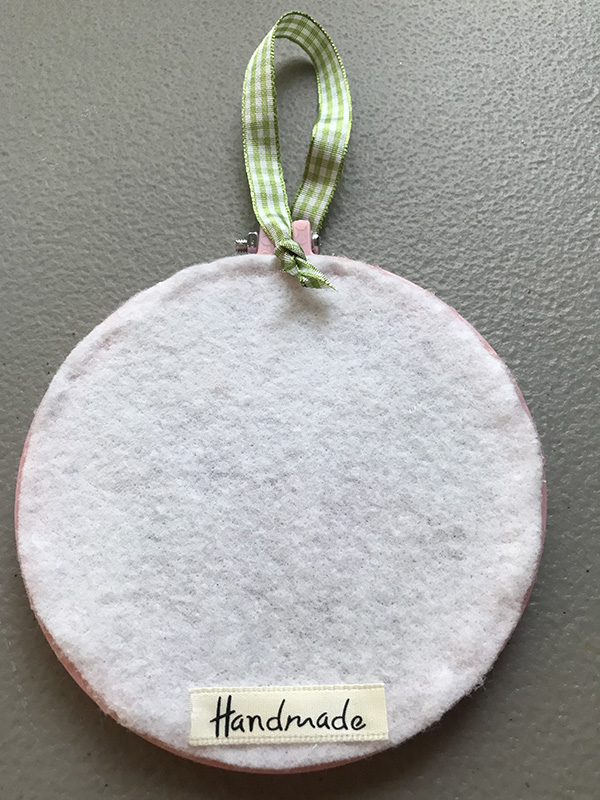
Once your felt is added to the back, you can add a cute label, if you wish. This label was cut from a piece of ribbon that was added with just a touch of hot glue.

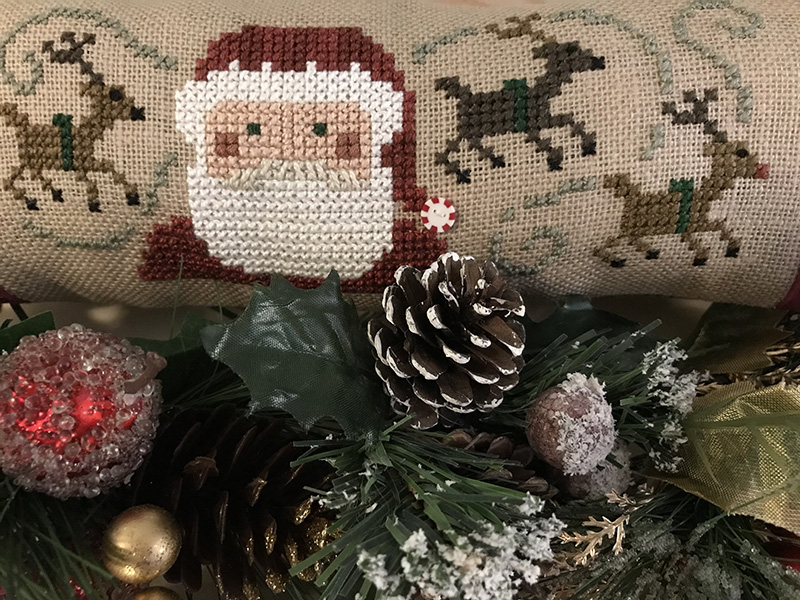
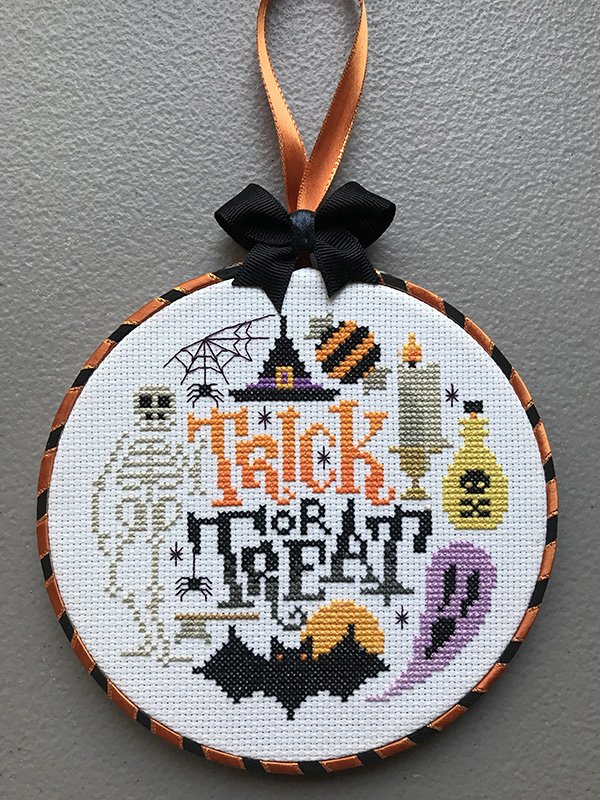
Add a ribbon for a hanger and then you can add other embellishments like a bow, other ribbons, small greenery, pinecones, buttons, etc.

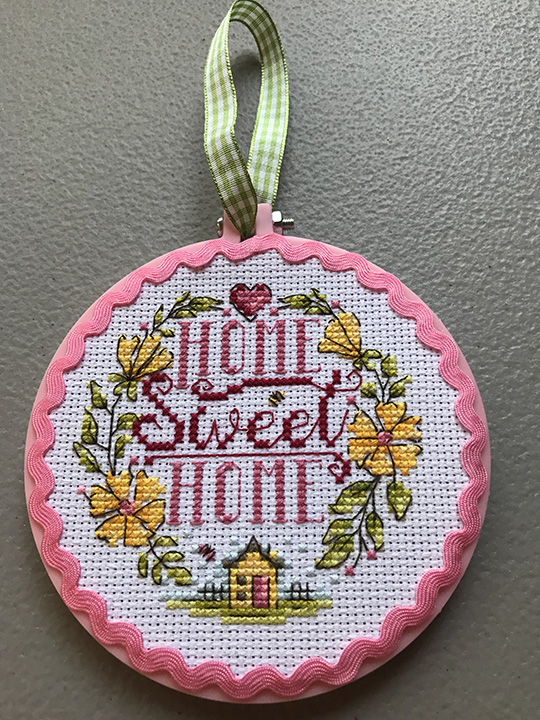
You can also finish off a plastic or painted wooden hoop with ric rac, as shown below. I started at the top and added a drop of hot glue, then pressed the ric rac in place. I curved the trim around the hoop and put a drop of glue every other top curve in the ric rac.

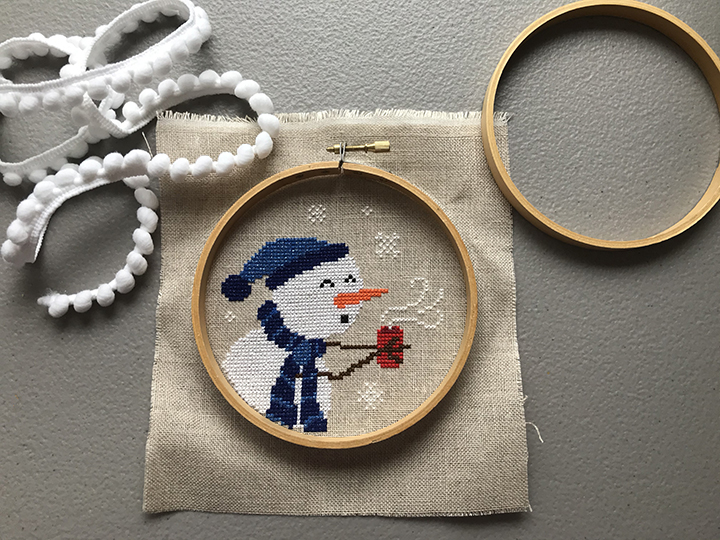
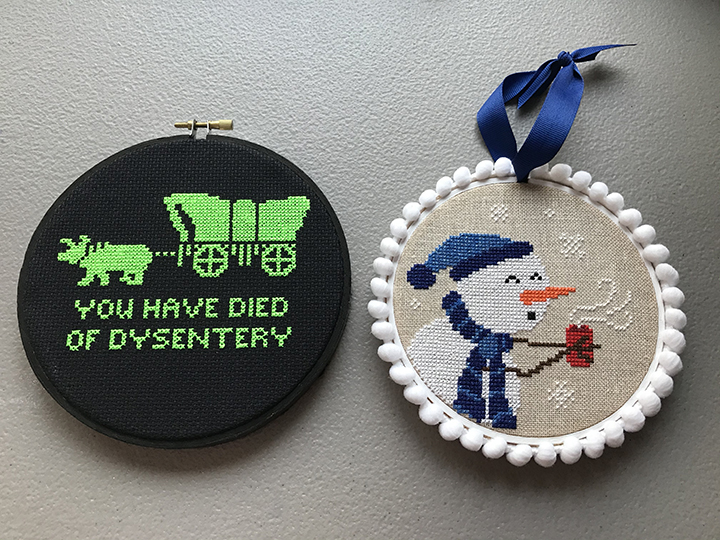
Pom Pom trim also makes a cute addition to your hoop finishing. I added it to a natural wooden frame that I did not paint, below. I used hot glue to add the trim on the outside edge of the outer hoop, making sure the pom poms were facing toward the stitched front.

What fun finishing designs can you come up with?

XXX
Carrie


A Santa Cushion

Posted on

I decided to finish off Santa and his reindeer as a long cushion. First I picked a coordinating calico fabric and cut strips which I sewed to the sides of the design.

Then I cut off the excess fabric from the top and bottom.

Next I pressed the seams open.

I then sewed on a piece of white ric rac down the length of each strip of fabric (but I forgot to take a picture of that part…oops!)

Next I picked out a different piece of coordinating fabric and sewed that to the back, with right sides together. I left one side open for turning.

After turning the piece right side out I stuffed it with fiberfill and used a chopstick to push the stuffing into the corners.

Then I finger pressed the side seams to the inside and held them together with Wonder Clips. The next step will be to hand sew the opening closed. I probably won’t be able to do this for a few days because this week is going to be crazy with doctor visits and other appointments. I’ll post pictures of the finished result when I’m done! And in the meantime I will look for my next project.

XXX
Carrie


Done At Last!

Posted on

It’s finally finished! I am so glad I persevered with this project. It actually didn’t take long to finish at all, once I had my system down for doing the grass part.

The fabric color was really tricky to capture on camera. It is actually a nice green color, and neither of these photos do it justice.

Start date: Summer 2012 (I think)
Completion date: October 29, 2021

Now to start on something for Halloween, even though it won’t be finished for this year!

XXX
Carrie


Two finishes

Posted on

I finished up the stitching on the cardinals and decided to frame it and my recent Home Sweet Home design. The Home project was already framed in a hoop that came with the kit, but I wanted to dress it up a bit. So I added pink ric rac to the front edge, and a gingham ribbon hanger.

The cardinals were even more fun. I framed them in an old wooden hoop I had laying around (it was more rustic looking than new ones) and added red pom pom trim to the edge. Then I added a blue dotted grosgrain ribbon hanger and bow. It was so warm and sunny out (for September!) and I managed to get a nice picture of it outside. That’s one thing I am usually pretty lazy about; I tend to just grab my phone and take a picture of my finished pieces wherever they are laying (see above!)

I think these both turned out so cute!

That is it for new projects, at least for a while. I need to get back to the Alice stitch a long, and I just have to finish that deer in the woods once and for all. So no new starts! But all cross stitching will probably be put on the back burner for a while. Now that school is back in session, I have to make up a batch of new masks for my kids to wear. I have already made a few for my son and although I sew them on a machine, my hands are hurting from the process of cutting the fabric, turning the masks right side out, and feeding the material through the machine. Even reading a book the other day was painful, trying to hold onto it. My grandpa had a saying, “don’t get old, it doesn’t pay”. He was so right!

XXX
Carrie


More Finishing

Posted on

I decided to go through my box of stitched pieces and pick out some to FINALLY finish off. These two were stitched a year or two ago but I never did anything with them. I love the hoop finishing because it is quick and easy and allows me to hang projects in areas where I wouldn’t be able to hang a large framed piece. For instance, I have several hanging by suction cups on the window above my desk. I can change these out with the seasons or just whenever I want. To create these two, I simply painted a wooden hoop with acrylic paint and then strung a ribbon through the tightener at the top.

This little hummingbird was featured in an issue of CrossStitcher (I think). He was super fast to stitch up and I just love the colors. He is tiny – the frame is only 4 inches!

This is my happy place – Epcot! In particular, Spaceship Earth. The pattern is from Awesome Pattern Studio. This used a 12 inch hoop.

XXX
Carrie


Mystery Project Part 4

Posted on

It is finished! And yes, it is the pyramids at Giza! I loved working on this and it was so easy. Except… the colors don’t look anything at all like the colors on the finished photograph from the chart. The blues of the sky are not even close. It called for DMC colors, so I am not sure what happened, but I think it looks ok and no one will be comparing the two side by side anyway. The instructions were also non existent and there was no color number listed for the shade that I used behind the hieroglyphs. So I had to just decide on a color. I opted for a light gray and in the end I was a bit disappointed because, again, it didn’t look like the model photo. Oh well.

I really have no idea how I am going to frame this because it is such an odd size. It’s also very small. I stitched it on 11 count to make it as large as possible.

XXX
Carrie


Two Hoop Finishes

Posted on

It is a cold, snowy, miserable Saturday. Time to get going on finishing off two recent projects!

The Oregon Trail piece is going to be really simple – paint a hoop black and then display it in that. I want the neon green to jump out from the black and be the star of the show. For the hot chocolate drinking snowman, I want to frame it in a white hoop and add white pom pom trim to the edges to look like snowballs. None of this was actually my idea; it’s simply a copy of how the finished project appeared in the magazine (Just Cross Stitch December 2020). Although, they finished theirs off as a flat ornament, and did not use a hoop. They also used twisted cord or floss as the hanger and I plan to use a ribbon.

The first step was to use Posca pens to paint the hoops. They required about 3 coats each, but each coat only took a couple of minutes to be fully dry, unlike paint which would have taken a few hours total.

Then it was time to frame the pieces in the hoops. I cut off most of the excess fabric, then turned the fabric to the back and hot glued it in place inside the rim of the hoop. Then I cut a piece of felt the same size as the back of the hoop and glued it to the hoop, ensuring that everything was covered and the fabric that I had glued down didn’t peek through. I chose felt sheets the same shade as the cross stitch fabric so that when the hoops are hanging in a window the sunlight will not shine through. The pom pom trim was hot glued to the outside of the hoop and a hanger was attached using blue ribbon.

I absolutely love how these turned out! I don’t have a hanger added to the black piece yet, but I probably will go with something really basic that doesn’t take away from the overall design. I do like how the blue ribbon actually accents the snowman’s hat and scarf nicely.

XXX
Carrie