Having just received my spool of Easy Count Guideline which I mentioned in a previous post, I am ready to start gridding the fabric for my Summer Ball project. First, I sewed around the edges of my fabric to stop it from fraying. Then I folded the fabric in half both ways to find the center. I used a scrap of floss to mark the center square in black, as shown here. (You’ll get a larger view if you click on the photos)
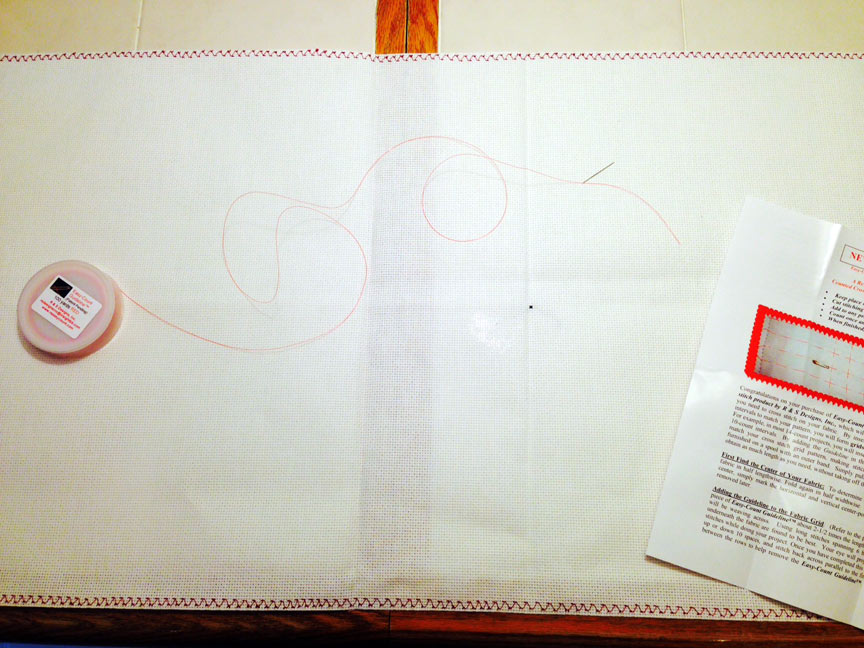
I then used the guideline to stitch over 6 squares, under 4, over 6, under 4, etc. I cut a piece of guideline longer than the length of the fabric, and started in the middle. I used the chart to help me place the first stitch. Because of the way this chart is, the black center square is not exactly in the center. The center lines intersect where there isn’t actually a stitch. This happens when you have a chart that is, say, 100 stitches long. 50 stitches would lie on one side of the center line, and 50 on the other. The exact center would be the line, not a stitch. If your chart was 101 stitches, then you would have 50 stitches on either side plus the one extra stitch would be the middle stitch. So I just chose one stitch out of the 4 that surround the center intersecting lines, and used that for my center. I found this square on my chart and colored it in with a yellow colored pencil.
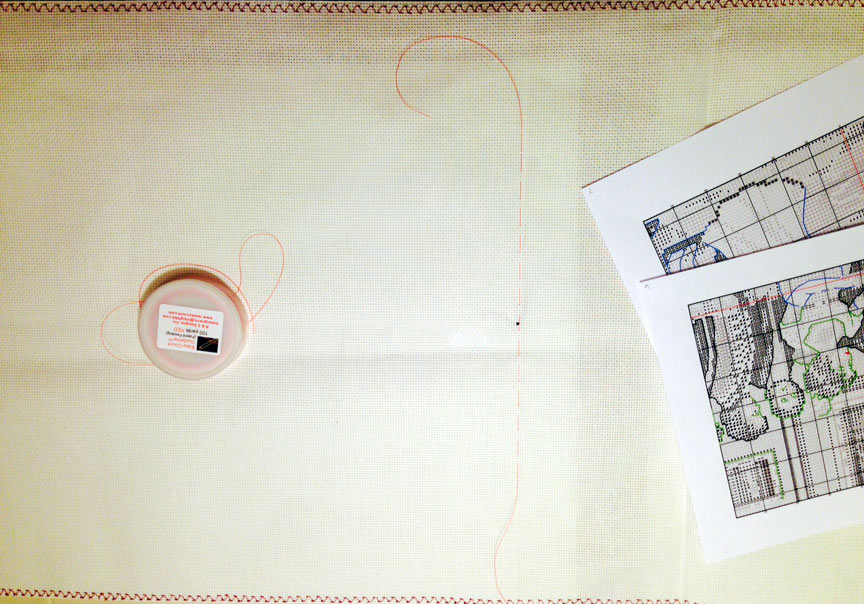
I counted how many stitches I need to go up from the center, and stitched the guideline in until I reached that spot. Then I stopped. I left the excess just hanging there. I then went back to the center and did the same thing from the center toward the bottom. I had begun stitching in the center with the middle of the thread, for this purpose. The photo above shows the finished center line, going vertically.
A close-up of the stitching process, over 6 and under 4:
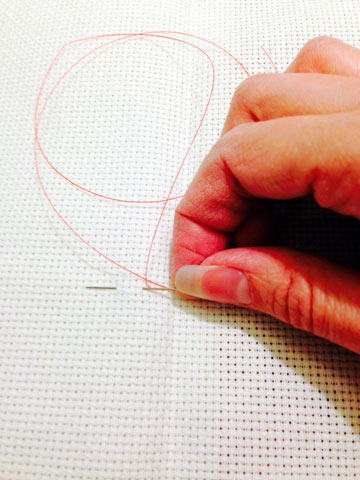
The reason you go over 6 and under 4 is because you want your grid blocks to be 10×10, to match your chart. 6+4=10. When you start gridding the fabric in the other direction, the lines will intersect exactly in the middle of the long top lines. You will have a perfect cross shape – your top line of 6 stitches will now be split in half, making 3 stitches on all 4 sides.
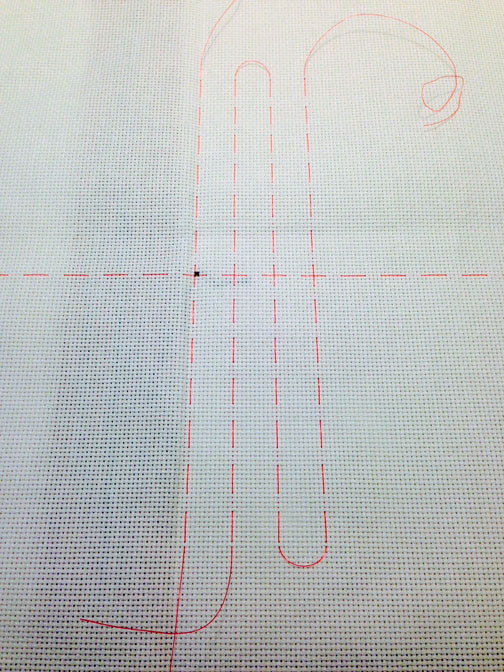
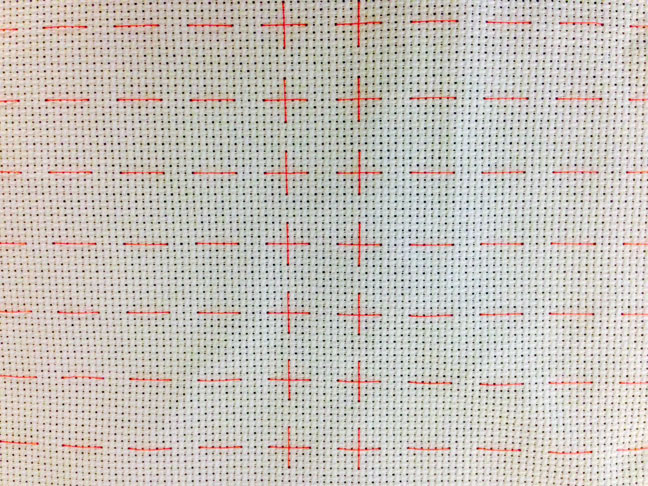
After stitching the center vertical line, do the center horizontal line. In the photo below, you can see that I have now stitched both the vertical and horizontal center lines. I have also stitched 3 additional vertical lines. Cut your thread so that you get enough for about 3 runs of the fabric, and that way you don’t have to start a new thread for each line. (If your project is small, do even more than 3 runs.) Simply let the thread loop at the top and bottom and count over 10 stitches to begin the next row. If you have counted correctly, you will get a perfect cross when you reach the center, as you can see here. You no longer need to count over 6 and under 4 after you have done a few rows. Your eyes can see where to enter the needle into the fabric. When you do all of the vertical rows on one side of the center, start over again from the center and work in the other direction. When this is complete, do your horizontal rows. The horizontal rows will require even less counting, because you are simply weaving your thread in to complete the crosses.
After you have done all of the rows, it should look something like this:

Don’t worry about all of those “tails” at the ends. We will knot them later so they don’t come undone. Or, just leave them – they will be safe when the fabric is rolled up onto the scroll frame.
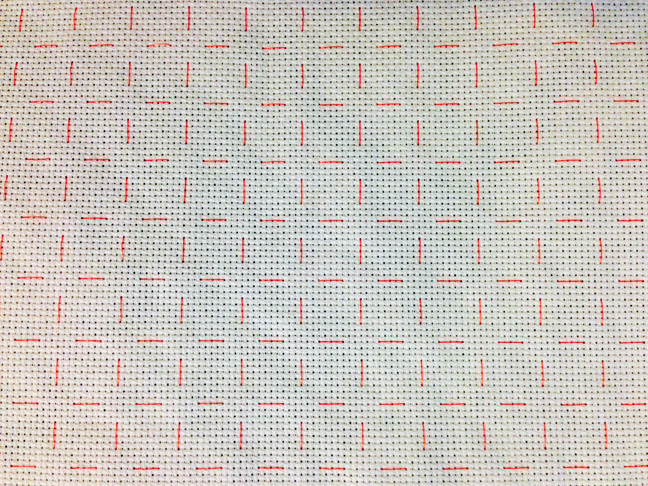
Here is what the fabric looks like after all of the rows have been stitched going in one direction, and two rows have been done in the other. (My fabric was actually turned sideways when I took this, as I did all of the vertical rows first, then started on the horizontal. Oops!)
This is a time consuming process. I wouldn’t be surprised if it takes me several hours to grid this project. But I think it will save much more time than that in the end. Now, for a break!
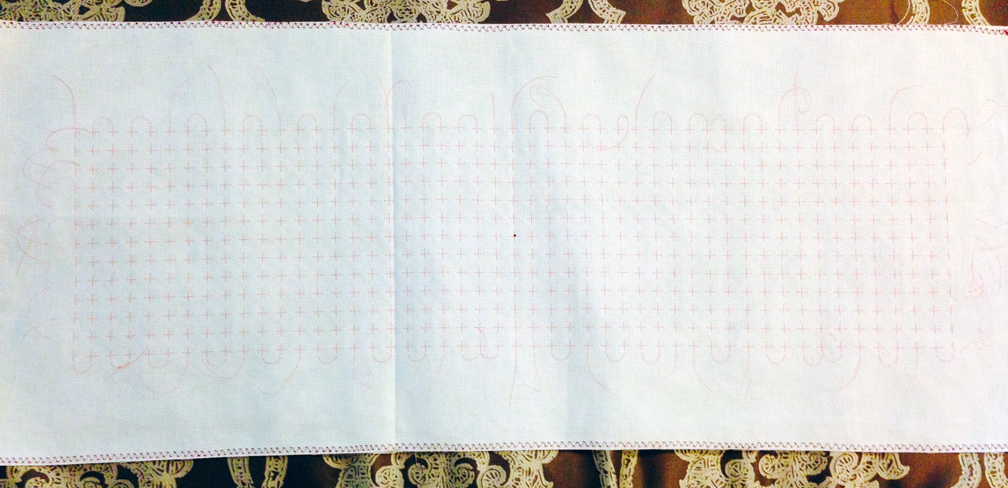
9/5/14 UPDATE: I have finally finished this, after putting if off for several days. Here is what the back looks like:
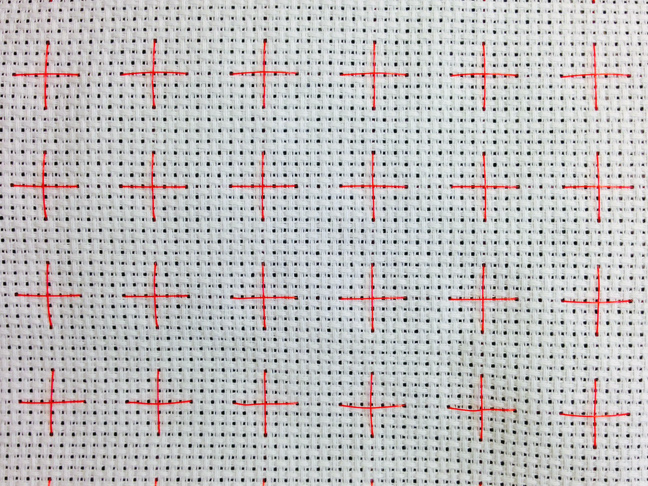
Here is the picture of the completed piece, with a close-up of some of the 10×10 areas.
XXX
Carrie