The Home Stretch

Posted on

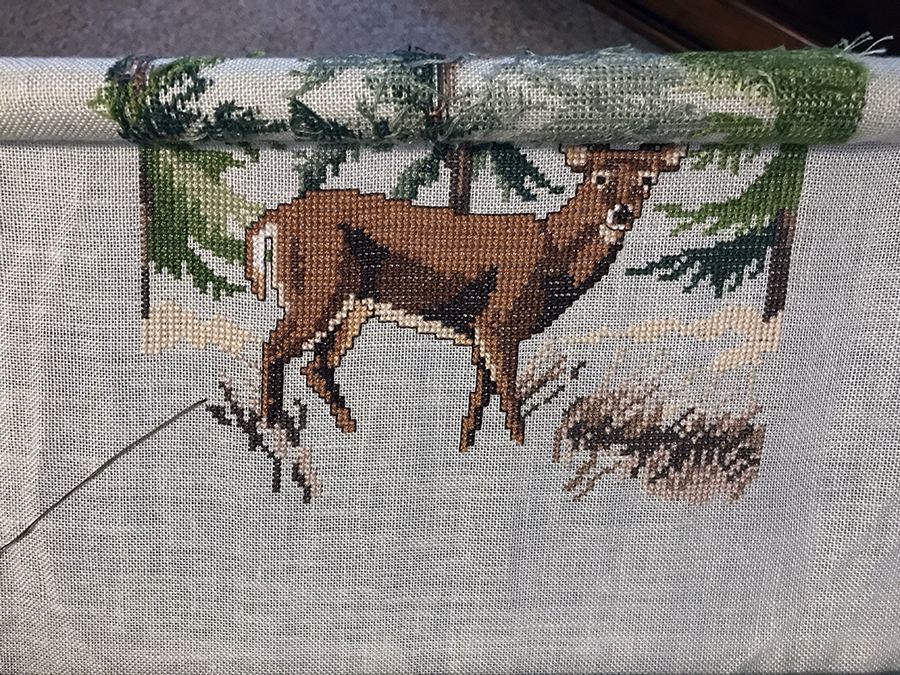
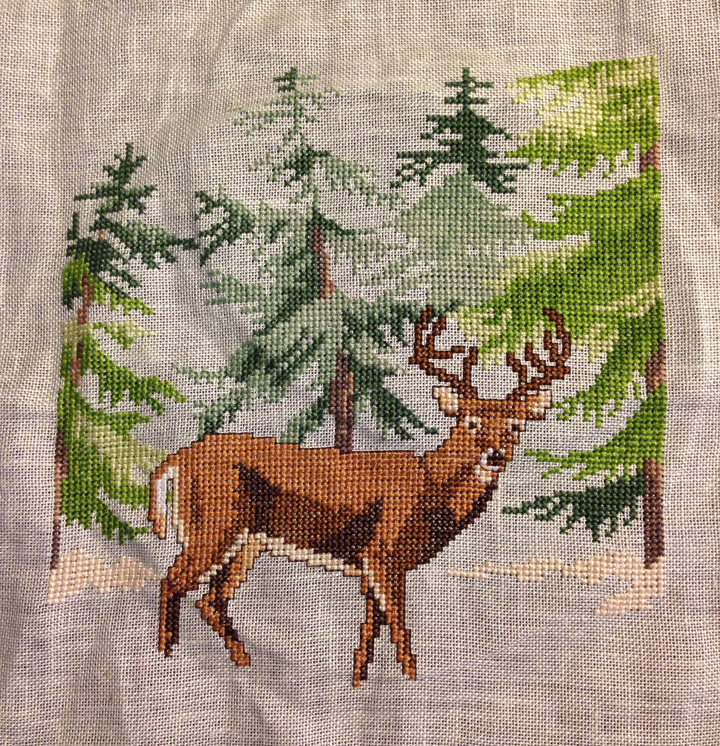
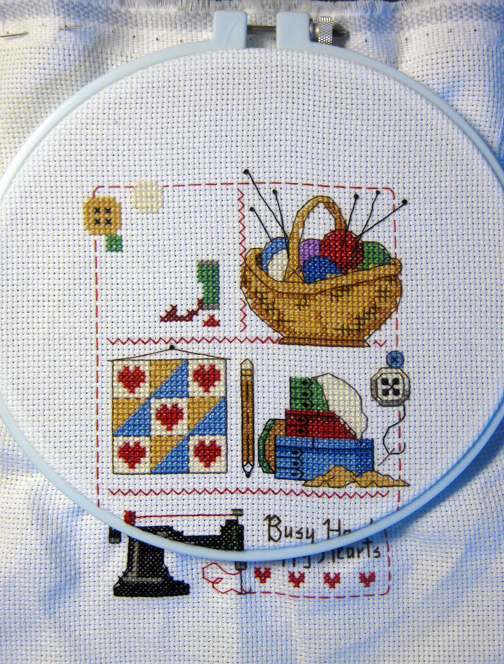
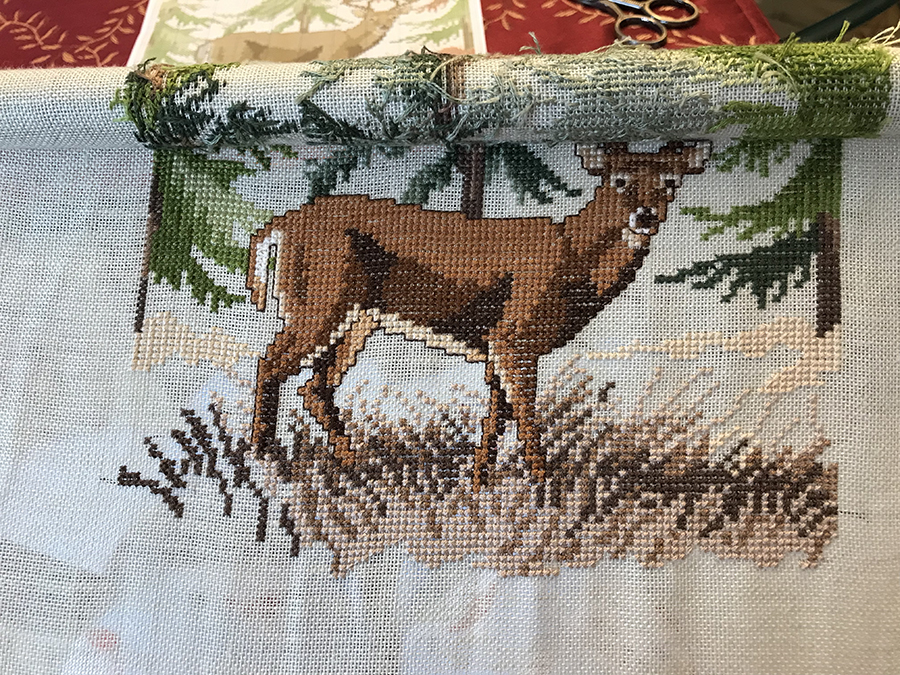
I am so close to finishing this project that I started in 2012! I finally came up with a system to make the grass at the bottom not so terrible. I started with the darkest brown which is not only the easiest to see, but also has the least amount of stitches. I used a Post It to keep my place on the chart and then crossed off my stitches with a marker. I did all of this color in a huge area. Then I moved on to the medium brown, which also was easy to see and marked that off with a different colored marker. Then when that was done I started with the third and final grass color, a pale brown that is harder to see against the fabric color. I started on the right hand side and stitched only the bottom stitches. After doing a large section that way, I went back and filled in with that color up to the top, and this was so easy to do while watching TV because there was no counting involved. After doing the right side of the pattern this way, I then moved on to the middle. Now that the middle is done I am working on the left side. After this area is filled in I will only have to do some backstitching in the grass and this project will be DONE! I am determined to get this finished before the end of the year so that it does not turn into a 10 year project. 9 years just sounds so much better 🙂

XXX
Carrie


Slow Going

Posted on

This grass area is so slow going and the counting is so difficult. As much as I want to finish this ASAP, I think I am going to have to put it away again for a while. It’s a good thing I was never a model stitcher for a magazine, as this project has been worked off and on for 9 years!

XXX
Carrie


Deer In The Woods… Again!

Posted on

I started this deer project in 2012, thinking it would look great in my husband’s cabin. I worked on it for a while, put it away, worked on it some more, put it away, etc. Now it’s 2021 and this is one of my few UFOs. I can’t stand to see it sitting in a drawer any longer, so I have decided I am getting this back out and won’t stop until it is done! The only part I have left is the grass, which is three shades of brown and then some wispy backstitches. Every time I try to work on this I get stuck because the pattern is so confetti-heavy and hard to follow. But I am determined to get this done, soon. This photo is my starting point.

XXX
Carrie


Glad to be Done!

Posted on

In September 2018 I started on this card kit. I quickly grew frustrated with it and put it away to work on other things. When I finished the penguin card kit the other day, I decided to finish up all the small projects I have going before starting anything new. I found this barely started kit in a drawer and decided to tackle it again. It only took a few days of stitching here and there and was a lot easier than I thought it would be. It was really only the backstitch and french knots that were an issue.

Yes, this is another cover kit from an issue of The World of Cross Stitching. I think it turned out pretty adorable, although I have absolutely no idea what to do with it now that it is finished!

XXX
Carrie


Deer In The Woods

Posted on

After finishing my last project, I decided to tackle the Deer In The Woods again. I have not worked on this in almost a year, and it was started several years before that. The shades of green and brown are not only boring to stitch, but difficult. Yet I want to get this one over with so I can start on something new. In a few days time, I managed to complete the last of the trees and started on the grass.

The grass is proving especially difficult, so after working on it a bit I decided to put it away again in order to work on A Summer Ball. In a couple of weeks I will go back to the deer and hopefully finish it up. Then I will finally allow myself to start on something new.

XXX
Carrie


UFO #4

Posted on

whirligigsantaMy fourth UFO was this Whirligig Santa, designed by the Need’l Love Company. It is from leaflet #27, Jingle Bells. I found this project inside a bag of Aida and linen fabrics that I bought at Goodwill serveral years ago. Santa’s hat and most of his face were complete, as was the top tree and part of the top arm. I decided that since it was such an easy project, and a photocopied chart accompanied it, I would complete it. It only took a few days of stitching. I think there might be an error on the chart, because I happen to have this same leaflet in my store, and therefore could see what the design was supposed to look like on the cover. The photo appears to have more backstitch than what is shown on the actual chart, but I decided to just stitch it as indicated on the chart. I don’t know yet how I will finish this, but it will probably end up in a frame. I am a bit disappointed about the white floss, which took on a reddish hue. No matter how careful I was, the red DMC 815 kept making the white floss discolored. Another challenge I faced was that this stitcher worked the opposite way I do, and so I had to make all of my stitches backward in order to make all of the stitches face the same direction. I did end up with a neat appearance on the back, though. Whoever started this project was certainly advanced in technique and very careful about not having knots or loose tails on the back.


UFO #3

Posted on

curlyq2

This is another project that I started about 12-15 years ago and almost finished, but then put away. Itis called “Sewing Machine Curly Q’s” by NeedleMagic, Inc. It is stitched on perforated plastic and the floss they give you is not typical DMC. Instead, it is a non-divisible, cheaply made yarn. I did all of the stitching, and then some of the backstitch, and then quit. When I got this project out again a few days ago, it was really hard work to stitch. The yarn is so thick, it makes threading a needle nearly impossible. And because all that was left was backstitch, all of the holes had already been used up with other yarn. So my fingers really took a beating on this one. In the end, I tossed the black yarn that came with it and used 3 strands of DMC to finish. It saved my fingers, and I don’t think you can really tell which part of the project is stitched with which thread. The package came with a magnet, plant poke dowel, and wire for hanging; you choose which you want to use.

curlyq1

I am so glad to have another UFO done and out of the way. Now I have to decide – tackle a large unfinished project (deer in the woods, Adrienne’s Christmas stocking, or the Peacock Tapestry), or start stitching small designs as gifts for the kids’ teachers. Decisions, decisions…

XXX
Carrie


UFO#2 is finished!

Posted on

busyhands5

I am so happy to be done with this UFO! And I am glad I had a frame laying around, otherwise it would have ended up with all of the other projects I stitch – in a drawer! I really hate finishing projects after I stitch them.

My next project is somewhat similar; a sewing machine made out of plastic canvas. It will be finished off with a wire hanger. I must have been going through a “need to decorate my craft room” phase or something. Unfortunately, my craft room is now my son’s bedroom. Maybe some day we will move into a bigger house and I can have my own space again… maybe. 

XXX
Carrie


Busy Hands

Posted on

dimensions

 Here is a project that I started a long time ago. It’s a kit by Dimensions called Sew Busy and is worked on 14 count Aida. I don’t recall when I started it, exactly, but I know it was after I moved here and before the kids were born. So my guess is this has probably been in storage for around 12 years or more. Enough is enough!

busyhands1

The middle of the design was mostly finished, except for a few french knots. The bottom wording and the sewing machine (that’s what the black blob will end up being) were done in the last 2 days. My goal is to have this one done by the end of the weekend. I was really able to get some stitching done this past weekend because of the time change! Who needs an extra hour of sleep – an extra hour of stitching is more important!

XXX
Carrie


Where Is Spring?

Posted on

It is April 12, and yet another snow day. We got about 10 inches of snow last night. It seems like spring will never be here! But while cleaning out my stitching stash I found this stamped pillowcase design that I started years ago.

There are two pillowcases, and one has not even been started yet. The other only has a bit done. I guess I just lost interest because it is not counted cross stitch. Stem stitches got kind of borning after a while. But maybe I should keep this out to work on during those nights when I am too tired to count stitches. I doubt I will get even one of these finished before the flowers outside start to bloom, but if this weather keeps up who knows!

XXX
Carrie


WIP? UFO? IDK!

Posted on

I’m not exactly sure what the difference is between a WIP and a UFO. I guess a WIP is something you are actively working on, and plan to finish, while a UFO is something that got started but then put away and will probably never be finished. I don’t know what category this deer would fall into. I started it not that long ago – late last summer, I believe. But after a while the colors just go so dreary, I had to put it away. The linen was getting annoying to work on, too. But now that I have finished up several new projects, I felt that I had to get this going again. It will hang in the cabin my husband is building, once it is finally built. He started working on that in 1996 and here we are in 2013, so I don’t feel there is any rush! But it would still be nice to be able to finish and frame this. Hopefully I will be able to get a good amount of this done before having to put it away again. Greens and browns are not my favorite colors, but we’ll see how it goes. Here is the “put away” progress photo.

XXX
Carrie