Stash Finish #12

Posted on

Finally done! I was afraid the slanted stitch on the grass would take forever, because it is over 1 thread. But it actually went a lot faster than I expected. I am really pleased with how this turned out. And just in time! We leave for Disney World in a few days and then it is back home to Michigan.

willowtreesampler

The color is a bit off from my camera, and it is badly wrinkled. I will have to wait until I get home to wash, iron, and frame this piece.

XXX
Carrie


Stash Finish #11

Posted on

Finally, mouse #3 is done! He is stash finish #11 for 2015.

stashfinish11

I have stitched all three designs on the long piece of fabric that came with the kit. I am not sure if I am going to cut them apart and put them in cards (which came in the kit) or leave it all together and frame it or finish as a bell pull. If I do leave it together, I think I will need to find a design to stitch in between the mice. Perhaps a small sprig of holly and ivy?

stashfinish11b

XXX
Carrie


Stash Finish #8

Posted on

Finally. This evil bunny is FINALLY done! I can honestly say that I have never hated working on a project as much as this one. It probably took me three times as long to complete as it should have, but the chart was horrible to work from and the colors all looked the same. I also hate how it looks like one ear is not finished. Bebunni, I will never stitch you again. Never.

bebunni

On the plus side, this was my “try out Thread Heaven” project and I must say I don’t think I will stitch without it again. I am still a bit worried that 30 years from now the threads will have deteriorated or discolored a bit, but I think I will still use it anyway. I just don’t think I will use it on the projects I am currently working on, because I don’t want them to be half with and half without it. But wow, what a difference for threads tangling. I didn’t have any issues at all on this card in terms of knotting and twisting. Thread Heaven will definitely be going in my stitching bag.

Now for a nice cleansing breath, and to start thinking about what I will work on next. I suppose I should finish up the Willow Tree Sampler, because I have come so far on it. And it has been a long time since I have worked on Summer Ball. I would also like to get the woodland deer out of the way, but all of that green and brown was getting tiresome.

XXX
Carrie


Getting the Family Involved (Stash Finish #7)

Posted on

Today I finished Nefertiti, and I had a bit of help from the family. With only three stitches left, I had my hubby and kids each put in one stitch so that this project was worked on by all of us. Naturally, Adrienne (5) had the easiest time with it because I have given her threads and a needle in the past. Aaron also did pretty well. But my poor husband couldn’t see the holes in the fabric so I had to help him out a bit. And here she is, finally finished, although she has not been washed or ironed yet!

egyptqueen

XXX
Carrie


Sachet

Posted on

sachet1

I finished the sachet today, although I am a bit bummed with how it turned out. The stuffing didn’t fill out the entire circle, so it is puffy in the center and bare at the edges. It is also quite bumpy looking at the bottom where I had to slip stitch it closed. The rest of it turned out fine because I used my sewing machine, but I had to leave a pretty big gap at the bottom so I could turn it right side out. It looks much better when I flatten it down with my hand, so I have put a heavy book on top of it and I think I will let it sit for a couple of days to see if that helps.

sachet3

I’ll post a photo of the finished piece after I let it “flatten out” a bit.

XXX
Carrie


Stash Finish #5

Posted on

butterfly2

The stitching on my floral sachet is done, but I didn’t feel like getting out the sewing machine and putting it all together. I had this free cover kit from an issue of The World of Cross Stitching which consisted of two butterfly cards. I decided to work on one of them for another quick finish. I think it turned out quite well! The cross stitching itself was very easy and took only a couple of hours to do. The backstitching was a pain, as is usually the case with Madeline Floyd designs. But in the end it turned out very nice.

butterfly1

XXX
Carrie


Stash Finish #4

Posted on

bellscard

This is a kit for a Christmas Bells card that came free with an issue of the British Magazine Cross Stitch Gallery. I was able to finish it in just two days of stitching. Of all the kits I have ever done, this was by far the worst in terms of sorting colors. I know it doesn’t look like it, but there were 4 shades of red, 4 shades of gold, and 4 shades of green. And the names meant nothing (parrot green, saffron). I had to use the color photo that came with the chart in order to figure it out. On the plus side, it came with WAY more floss than was needed, so my ORT jar is filling up nicely! And the card blank that came with it is lovely. The picture doesn’t really show it, but the entire card is gold paper with a nice lined texture to it.

XXX
Carrie


Stash Finish #3

Posted on

This is the card kit that had the faulty floss. I actually had plenty of that pink color to work with, but ran out of the light blue, go figure. Luckily I found a match in my stash of DMC. The kit didn’t specify a color number, but I think the match is pretty darn close. The backstitching on this was a bit of a pain, and I noticed that the stitched models did not look the same as the chart. The chart actually had more backstitching than what was on the models. I think it looks better with the extra stitches, so I stitched it as charted.

prettyroses

The design is from April Rose Illustration and was the free cover kit with issue 217 of The World of Cross Stitching.

XXX
Carrie


My first Hardanger!

Posted on

Ta da!

hardanger13

I am so excited to be done with my first ever Hardanger project, and that it came out so well. There are a few little “whiskers” I still need to clean up, but other than that I am very happy with it. I think I will add a hanger at the top to make it into a Christmas ornament.

Here is what it looked like when the stitching was finished, but it had not been cut out yet:

 hardanger11

The only downside to being done with this is that I have to get back to work on Adrienne’s stocking. Christmas is in 3 months plus a few days! YIKES!

XXX
Carrie


Jane Eyre, Finished

Posted on

I didn’t get any stitching in yesterday but I was lucky enough to finish this tonight. I played around with a couple of frames that I have (it’s a standard 5×7 size) but nothing looked right. I think I might do a flat-fold ornament finishing on this one.

janeeyre4

Unfortunately, my camera just can’t get an accurate picture of the colors in this one. Hopefully when it is finished I will be able to get a better photo.

XXX
Carrie


Mason Jar Tutorial

Posted on

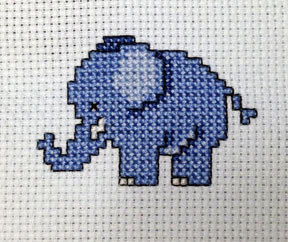
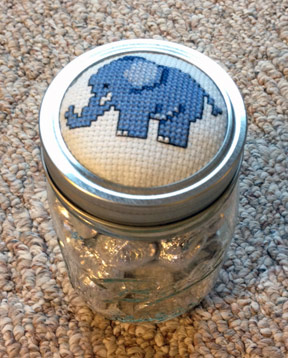
I decided to turn the small elephant into a Mason jar to fill up with candy for one of Adrienne’s preschool teachers. Having never done this before, I had to kind of play it by ear. Here is how I did it, although there are probably many other ways it can be done.

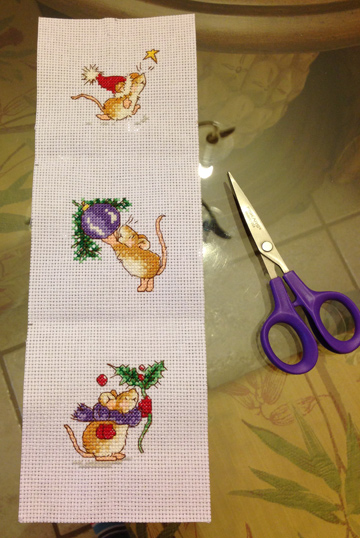
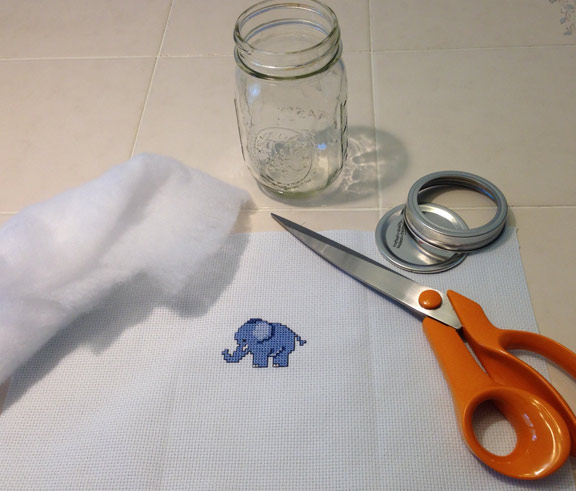
First, assemble your supplies: the finished stitching, a Mason jar with lid and ring, scissors, fiberfill stuffing, a pencil, Elmer’s glue, and a hot glue gun.

jar1

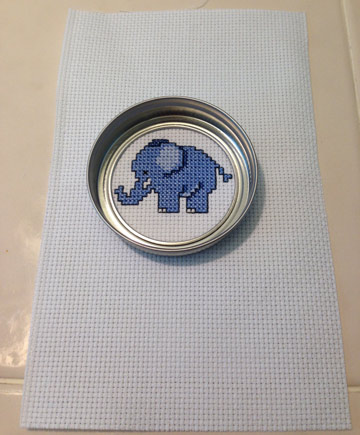
Center the ring over your stitching to make sure that it fits. As you can see from the photo, my elephant just barely fit inside. Using the pencil, lightly trace around the outside of the jar ring. Cut out your stitched piece, cutting on the pencil mark.

jar2

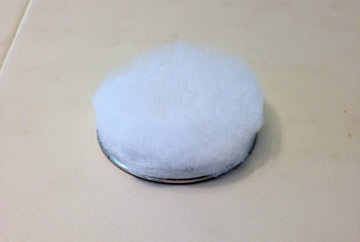
Use the jar lid (not the ring) as a template to cut out several circles of fiberfill. Glue the fiberfill circles to the top of the lid. Elmer’s glue will probably work better for this than the glue gun. The more fiberfill, the puffier the end result. Of course, you can skip this step altogether if you want your stitching to be flat against the lid.

jar3

Unfortunately, I forgot to take a photo of this next part. Put your cross stitched circle into the ring and make sure that it is centered. Put the fiberfill/lid inside the ring so that it rests on the stitching. Look at it from the right side – the design should be centered and the fiberfill should make it puff up. When you are happy with it, take the pieces out. If your circle of fabric is too large and and the edges are not laying flat in the ring, trim off the edges slightly. Spread hot glue all around the inside of the jar ring and press the stitched piece onto it. You will have to work quickly to make sure it doesn’t harden on you. Try not to use too much glue because the bumpier (thicker) it is, the harder it will be to get the lid to screw onto the jar. Then put hot glue on the edges of the lid with the fiberfill and press that onto the stitched piece.

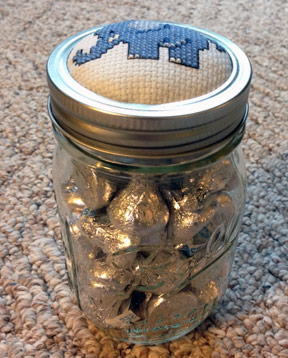
After your lid has been glued, attach it to the jar. It will only screw on if you have pushed it down all the way and don’t have any excess fabric showing. If you do have excess fabric, you should be able to cut it off using an X-ACTO knife. I had little bits of fiberfill coming out that needed to be trimmed off. Let the lid sit on the jar for a while to make sure the glue is dry and hardened and the stitching is pressed into the lid tightly. Then, you can unscrew the lid and fill the jar with goodies – in this case, Hershey Kisses!

jar5   jar4

XXX
Carrie


Elephant

Posted on

elephant2Finished! This cutie only took a couple of hours and was fun to stitch. I think it is just the right size for a Mason jar lid, so I think I will finish it off that way and then put some M&Ms or other goodies in the jar for Adrienne’s teacher.

XXX
Carrie


Owl completed

Posted on

Here is the third and final day of stitching, Monday. The owl is complete! I think it turned out really cute. I used 14 count white Aida and three strands of DMC floss to make it really “pop”. Now I just have to figure out how I want to finish it. I am thinking of making it into a mini cushion with some vintage fabrics. An excuse to go shopping! I think I will check out Pinterest and Google images for inspiration.

owl3

XXX
Carrie


UFO #4

Posted on

whirligigsantaMy fourth UFO was this Whirligig Santa, designed by the Need’l Love Company. It is from leaflet #27, Jingle Bells. I found this project inside a bag of Aida and linen fabrics that I bought at Goodwill serveral years ago. Santa’s hat and most of his face were complete, as was the top tree and part of the top arm. I decided that since it was such an easy project, and a photocopied chart accompanied it, I would complete it. It only took a few days of stitching. I think there might be an error on the chart, because I happen to have this same leaflet in my store, and therefore could see what the design was supposed to look like on the cover. The photo appears to have more backstitch than what is shown on the actual chart, but I decided to just stitch it as indicated on the chart. I don’t know yet how I will finish this, but it will probably end up in a frame. I am a bit disappointed about the white floss, which took on a reddish hue. No matter how careful I was, the red DMC 815 kept making the white floss discolored. Another challenge I faced was that this stitcher worked the opposite way I do, and so I had to make all of my stitches backward in order to make all of the stitches face the same direction. I did end up with a neat appearance on the back, though. Whoever started this project was certainly advanced in technique and very careful about not having knots or loose tails on the back.